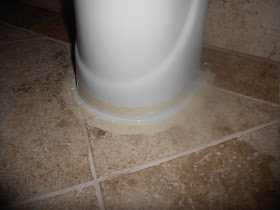
If you remember our upstairs bathroom had some problems (here) and I decided to dive in. These three things were the BIG problems in our bathroom.
Supplies:
Grout Removal ToolGrout (same color as current)
Grout float
Sponge
2 Buckets (One for Grout, One for water)
Rags/Paper Towels
Grout Sealer
Foam Brush
Shop-Vac
Paint Stick (mix grout)
Tape
Razor Blade
Bathroom Caulk
How To Re-Grout Tile:
Here is the grout removal tool I used. The grout came up really easy with it. You give it some presser then move the tool back and forth, like a saw. Remove all grout that is coming up or will come out.
Next you will need to get your Shop-Vac and vacuum the dirt/old grout. You will also want to make sure all your tile is cleaned.
You will need to tape off anything that should not get grouted.
Now we are going to mix the grout.
A great tutorial on how to grout is found at: Young House Love here
I was nervous about this because I have never grouted before but let me tell you it is not that hard and I enjoyed it.
To mix grout: read directions on your grout bag. But you put some water then grout and mix (I used a paint stick but you can use something else).
After reading up on grouting, I found that the grout should be between cake batter and peanut butter. This is what I came up with.
To apply grout, you place on your float or tile.
Then pull/move at a 45 degree angle, to get it into the crack.
Wipe away at a 90 degree angle.
After letting it sit for over 15 minutes but not over 30 (again read your bag). You will wet your sponge but you only want your sponge to be damp.Then wipe but not to much that you remove more then needed.
With my grout I need to wipe again after 7 hours to remove the white film.
After letting it sit for 48 hours, this is what our tile looked like.
Success!!!
But know you will need to seal your grout.
Here is a great tutorial on how to do this here
I decided to use a foam brush to apply the sealer because I really wanted it to get into the grout. Before starting read the directions on your sealer, mine said to apply then wipe with a white cloth after 3-5 minutes. Make sure you open a window because this stuff is smelly (as my daughter says it). This needs to sit for at least 48 hours before using the tile, so plan ahead.
After sealing all the grout and letting it sit for 24 hours, it was time to remove the old caulk and apply new.(I removed caulk before applying sealer) I used a razor blade to remove old caulk which took me no longer the an hour. Then cleaned the area with the Shop-Vac.
Next you can tape around the area to get a cleaner caulk, see here.
Get your bathroom caulk ready. Cut the tip at a 45 degree angle.
Caulk around then smooth it, add more if needed or wipe off extra on paper towel.
DO NOT let the caulk dry with tape around it. I took my tape off after about 10-15 minutes.
Very lightly, smooth out were the tape was, be careful not to push very hard because remember you already did that part, you are just making sure you have a good sill. Now walk away for the bathroom for 24 hours to let the sealer finish and caulk dry completely.
Just in cause you could not remember the before.
I am NO pro but I think I did a pretty good job but anything was better then before.


No comments :
Post a Comment